👟 Keep Your Sneakers Fresh and Fly!
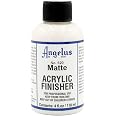
Angelus Sole Bright is a 3.9 oz restoration solution designed to effectively remove oxidation from rubber soles, bringing them back to their original clear look. This versatile formula works on most rubber surfaces and is easy to apply, making it a favorite among sneaker enthusiasts. Made in the USA with premium ingredients, it ensures professional-grade results without damaging your shoes.


| Manufacturer | ANGELUS SHOE POLISH |
| Part Number | 876-04-000 |
| Item Weight | 0.16 ounces |
| Product Dimensions | 1.65 x 1.6 x 4.9 inches |
| Item model number | 876-04-000 |
| Is Discontinued By Manufacturer | No |
| Size | 3.9 Fl Oz (Pack of 1) |
| Color | Clear |
| Finish | Gloss |
| Material | Rubber |
| Item Package Quantity | 1 |
| Number Of Pieces | 1 |
| Special Features | Glow |
| Usage | Interior |
| Batteries Included? | No |
| Batteries Required? | No |
B**T
IT WORKS!
Angelus Sole Bright worked exactly as advertised and brought my SB Dunks back to life. I had some serious yellowing on the soles, and after a few sessions following the instructions (apply, cover, and UV expose), the soles turned noticeably icier and cleaner. It doesn’t completely restore them to factory-new in one shot, but the difference is huge — way better than I expected for a home treatment.The gel is easy to apply, stays in place without dripping, and a little goes a long way. It’s a must-have if you’re serious about keeping your sneakers looking fresh and hate seeing your icy soles turn yellow.Highly recommend for SB Dunks, Jordans, or any pairs you want to revive.Rating: 4.8/5Pros:• Effectively reverses yellowing on soles• Easy application and cleanup• Works great on SB Dunks and other sneakers• Noticeable results after just a few treatmentsCons:• Takes a few sessions for best results• Requires sun/UV light for full effectiveness
A**Y
This REALLY works, but you really have to let these cook in the sun to activate the product.
Four pictures "Before", and four pictures "After".It works. Period.I had to figure out my process by some trail and error, but I finally dialed it in.This pair was a bit hurried, but three other pair where I did not have "before" pics came out mint!What you need:1. Nitrile gloves and protective eyeware.2. A small detailing/paint brush.3. Plastic kitchen wrap.4. Clear packing tape.5. 3.5 gallon clear zip lock bags6. Some cotton rags7. Running waterHere's how I did it.1. This stuff is strong, so make sure you wear nitrile gloves! It would be smart to wear safety glasses!2. Put some product on your gloved hand and gently and carefully smooth it onto the sole areas that need whitening. Use a small detailing brush to get right up against the upper of the sneaker. But DON'T get it on the upper of the sneaker.3. Lay out a flat piece of wrap lenghtwise with 1ft extra at the front and back of the shoe.4. Wrap the sneaker in plastic kitchen wrap. Keeping only one layer of film on the solr, bring the sides up first, then bring the front up to the tongue, then bring the back up and over the opening to the tongue. Tape the front up tight to the tongue. Tape around the heel tight to the sides., Don't bunch the wrap on the sole area. Try to wrap tight on the upper part of the shoe to keep the moisture in.4. Please the shoes in a 3.5 gallon zip lock bag. Again to keep the moisture in.5. Face the soles/sides/front/back towards the sun and let it cook. No less than 3-4 hours on each side that needs whitening. Adjust the shoes to track the sun so that you get even coverage.6. When you look through the bag/wrap and see gleaming white shoes, you know they're done.7. With nitrile gloves on, carefully remove the shoes from the zip lock bag. Wash the bag if you have more shoes to brighten.8. Carefully remove and dispose of the plastic wrap. Do not get any of the product on you, furniture, or other surroundings.9. While cold water is trickling, gently take a cotton rag and carefully rinse the product off without getting the upper wet. Use a tiny brush to clean any treads in the bottom of the sole being very careful to not flick product towards your face.10. After carefully rinsing the product away, use another cotton rag to dry the soles. Set your shoes somewhere to dry where any water or missed product won't ruin the surface.11. Wear your dunks and smile! You're not an NPC!Lessons learned.1. Don't underestimate how strong this product is. Use gloves and eye protection!2. Don't be cheap with the kitchen wrap, tape, brush, rags, or zip lock bags.3. Sunny days produce the best results.4. A UV curing lamp won't do the job.5. Don't be stingy applying the product, but at the same time don't use so much that it drips and smears onto the upper.That's how I did it. That's what I learned.Good luck!
S**.
Great product but the sun is hot
Works great for yellow soles, after baking them in the sun for a couple hours the original shoe glue started to melt, id try a UV light next time
H**R
Product Work But Give It Time
I had some sneaker that got discolored from not having in a box.I tried baking soda, it helped but it was still yellow.I decided to try this product out.Make sure you use glove. If you use your hand it does leave your hand feeling tingling and leave a white stain on your hand. (Photo shown)It recommends to use sponge and gloves.Apply cream on to the desire area with a sponge and put it under a UV light or sunlight.I live in a nyc apt. I don’t have no direct sunlight unless it my window. Therefore I think that’s probably why I need more time for it to get better results.First day, I cover it with plastic. It didn’t go much. I decided to do it again without any plastic, the next day. It work better. I did it for another day, I got better results.For the price, it’s not bad but it’s definitely a product that you need time to let it work.It took me almost 3 days for that results. I still think it’s need more time.I give it a 4 stars because it does need time to work and it’s just not as fast as I would like it to have been.The product does work.I compare it to a bounty white paper towel so you can compare the difference.Thank you for taking a minute out of your busy life to read my review. Please let me and Amazon know if you found this review helpful by clicking on the “Helpful” button below. I appreciate your support and thank you in advance. I receive no monetary compensation for my reviews, but try to help potential buyers make an informed choice.
C**G
Good stuff. Totally worked.
I got these for my pair of Selehe Crocs white with gum toes and bottom. The gum toes have yellowed in 3 yrs and I brushed the stuff on, only the toes and not the bottom (to compare end results), cover the treated area with a single layer of Saran Wrap, left it in front of my Gardyn grow/uv whatever light for 4-5 hrs… it definitely worked, the yellow is back to a more natural gum color, close to looking new. The untreated bottom is noticeably darker and more yellow…I did do the process twice, and I believe it was needed. However, it’s super easy that the total process of treating the area took less than 5 mins. Good stuff.
Trustpilot
1 week ago
2 months ago