
🛠️ Level up your DIY game with retro vibes and modern STEM smarts!
The Etoput DIY Soldering Project Game Kit combines hands-on electronics assembly with five classic retro games, powered by USB or AAA batteries. Featuring a high-speed STC chip, 16x8 dot matrix display, and large tactile buttons, it offers an engaging STEM learning experience with clear step-by-step guides and real-time scoring, all housed in a sleek acrylic case perfect for family education or gifting.


| ASIN | B07HB3HPPJ |
| ASIN | B07HB3HPPJ |
| Batteries Included? | No |
| Batteries Required? | No |
| Best Sellers Rank | #203,289 in Toys ( See Top 100 in Toys ) #197 in Electronic Kids' Games |
| Color | Yellow |
| Customer Reviews | 4.6 4.6 out of 5 stars (579) |
| Customer reviews | 4.6 4.6 out of 5 stars (579) |
| Date First Available | 7 October 2018 |
| Date First Available | 7 October 2018 |
| Handle Material | Acrylic |
| Head Style | Conical |
| Included components | Game Kit, Acrylic box |
| Is Discontinued By Manufacturer | No |
| Item Package Quantity | 1 |
| Item Weight | 150 g |
| Item model number | cabafa0f-14a0-4f20-938d-0fc05cc4ab13 |
| Item model number | cabafa0f-14a0-4f20-938d-0fc05cc4ab13 |
| Manufacturer | Etoput |
| Manufacturer | Etoput |
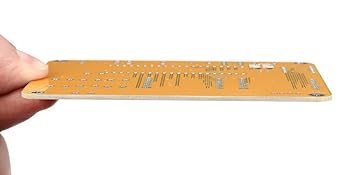
| Material | PCB |
| Package Dimensions | 12.4 x 9.8 x 3.7 cm; 150 g |
| Package Dimensions | 12.4 x 9.8 x 3.7 cm; 150 g |
| Part number | CSPJ |
| Power source type | Battery Powered |
| Size | 75x105x10 millimeter |
| Special Features | Portable |
| Specific uses | Electronic |
| Style | Game_Kit |
| Voltage | 5 Volts |
| Wattage | 5 watts |
| tech_spec_battery_description_toys | Alkaline |
T**K
Bought this as a Christmas gift for my brother, he says it was a great beginner kit. The instructions were very good at explaining step by step and component L's fit well and were easy to solder in and in the end it was very fun to play with (but not to eat 😂) 10/10 would recommend.
J**E
This is not a bad kit, and is fairly easy to assemble if you pay attention. Only it does have one issue which I can't seem to fix. When powered off USB it won't run for more then a minute then shuts down and has to be powered on again to keep using it.
J**N
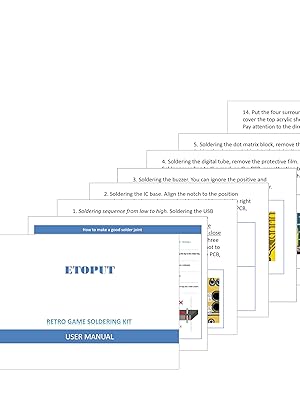
User Glaucon already posted a fantastic review, I want mine to complement that one. Please read that first and then come here for the things I'd like to add. (pause) The kit has a full-color instruction sheet with pictures, and is laid out in a way that if you follow the numbers for each step it works rather well. The steps are laid out in an odd fashion but again, follow the numbers. The PDF instructions mentioned in the product description do provide a few other CRITICAL pictures if you haven't done many kits like this or aren't familiar with the parts. Please look in the QA part of this item to see the link to it in dropbox. You want to look at the file called "User Manual new.pdf" The battery box has wires that are very long, but I chose to leave them that length. Iwrapped them once around the box before using the double-stick tape to attach the box to the back of the case. (Be sure to route the wires through the little U-shaped hole on the wall of the case where the USB connector hole is.) DIY Improvements you could do: - The bare LED matrix and number display are a bit bright to my eyes, even if you lower the brightness on the system's menu. I'd suggest either finding some "window tint film" at a car parts store or getting a transparent-color plastic notebook organizer sheet and cutting it to match the top plexaglass part of the case, to make the lights less hard on your eyes. If the manufacturer reads this, if you can order this with a darker or "smoked" plastic, like what sunglasses use, I think it would be a nice improvement. - The Micro USB socket is a bit dated. If you can find a socket that is Mini USB or USB-C and replace the included USB socket with that, you'll have an easier time finding a replacement cable if you lose yours. - I have seen at least one 3d printed case for this on a popular free 3d printing site, if you want to make your own case that does not expose the battery box. It can be found if you search with the words DIY, kit, and brick.
X**H
I love this thing! I have a lot of experience with soldering already so this was a breeze, but the instructions are very good and well-illustrated so an inexperienced person should have no trouble figuring it out. The solder points are all nicely spaced and should be plenty forgiving, with the sole exception of maybe the USB port; the instructions maybe should make mention that this part is optional because it's only used for powering the device (I'm not sure yet, but I don't think it's easily reprogrammable - though I have reasons to believe it might be and I'll update this with whatever I find), and if you just plan on using the supplied 3xAAA battery holder to power it, you won't need the USB socket. I opted to use a LiPo battery I'd had on hand (I don't remember what I pulled it from, but I'm including a picture; it's a weirdly-sized one that just happened to fit in the front between the buttons and the large IC. In the future, I think I'm going to buy some longer stand-offs and stick 4x 18650 batteries on the back of the board along with a USB power bank circuit (available cheap on Amazon!), so what I'll end up with will be a USB power bank that also plays games. And the games are actually fun! The description really should make mention that the highest-achieved score in each game is retained in apparently non-volatile memory (they persist even after powering off and replacing batteries), while really lends well to challenging replayability. Hey, TAG teachers! Buy these for your kids! It does not disappoint.
M**E
The instructions were actually written quite well, and my 8yo and I didn't have trouble following them. (I did the soldering with him beside me) It made him more excited about electronics and all went smoothly except the red power-button cover doesn't fit for some reason. But it worked perfectly right after assembly and has cool games that look great.
Trustpilot
4 days ago
3 weeks ago


